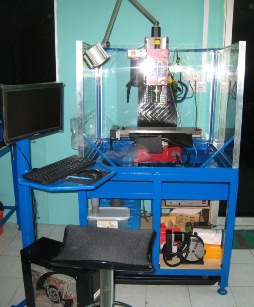
The Promica CNC Mill. It is an Sieg X3 reborn to a better, more useful life. Promica was known for the quality of workmanship (personally I would call it somewhat just slightly above average) and great support. I got the full turnkey job with spindle mods and 4th axis. Cost a bundle.
Then Mark Huet (the Promica guy) dumped the business, left all his customers in the lurch and refuses to answer any sort of contact.
So we are left with a product that has no current or future support, no replacement parts and very little reference material.
I still like the Mill though... |
 |
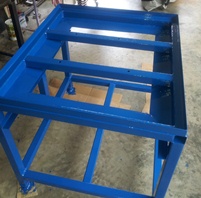 |
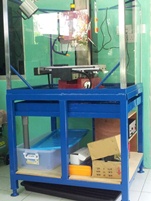
The First thing to do was to mount the Mill on a decent bench. I decided to build out of my favorite 50mmX50mmX3mm box steel. I designed it to withstand an earthquake not wanting to be later worried about strength!
I also designed a removable swarf/coolant tray to promote easier cleaning and also to allow full and easy acces to the underside of the mill.
The tray is built from 1.5mm sheet, and I used 35mmX3mm angle as the tray support. Not having access to a sheet bender or press brake, I used the leftover 6mm plate from my Workbench to make a welding table and with a couple of "G"clamps, and the remaining pieces of 6mm plate, I hammered the 1.5mm sheet into a swarf tray!
It all got the usual Chrome/Zinc Primer and Blue topcoat, with those special little adjustable feet (al la workbench) made from bolts, nuts and washers, with some cork caps...
I used the Plamsa cutter to cut a hole for the drain and fitted a standard sink drain for the coolant to return to the coolant tank.
The table weights a ton! Well not actually but feels like it ;) ... |
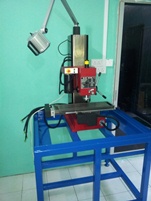
I decided the best way to get the mill on the table was in pieces, and since it needed stripping down to clean it before use, it sort of just happened that way, but not before many sleepless nights spent wondering how to lift it up on the table!
So I stripped it down and cleaned everything, then assembled it slowly piece by piece onto the table. I could manage to lift this all by myself, but the column was a strain..
I had drilled holes in the table before assembly for the retaining bolts. It fitted like a glove. I used a scrap piece of plywood to stop the mill scratching the table paint.
It sure was rewarding to see the Mill finally sitting on its table! |
 |
 |
Next to do was build a coolant and swarf cage to stop coolant and swarf from being flung everywhere.
I used 15mm X 0.5mm box, some 12mm aluminium channel to retain the 5mm Clear Perspex. I also used some 40mm Aluminium Angle to finish the corners.
It was important to be able to remove the perspex for cleaning and also for access. I made a half height front panel as well.
When I designed the table I did not want to go much bigger than 1100mm so without offsetting the Mill, I ended up needing to cut a section out of the left side
and create a box for the X Axis CNC table end to protrude out of. Slight oversight but also I wanted the smaller footprint.
I needed to bend the Perspex to shape, so I gained another joyous experience in using a heat gun and carefully bending the perspex.
The end result is actually visually pleasing and very practical. The perspex does a great job with the coolant and swarf.. |
The last thing needed was to finish off the flood coolant system.
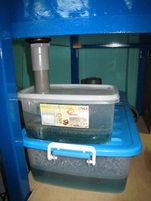
I used standard plastic pipe fittings, large and small clear plastic containers from the local supermart, a bunch of aluminium that I made the pump holding
bracket out of. I used Aluminium because of its resistance to corrosion. It is reveted together to form a strong base for the coolant pump.
I bought a magnetic coolant hose end fitting so it would be easy to move the collant flow onto the workpiece or tool.
The coolant flow from hose to job to tray and back into the storage reservoir via a "settling" reservoir.
I added a second pipe and tap controls to help control excess pressure from the coolant pump. |
 |
